How To Use IoT SSH From Anywhere Ubuntu: The Ultimate Guide
Are you ready to dive into the world of IoT SSH on Ubuntu? Let's be honest, the idea of controlling your devices from anywhere sounds straight out of a sci-fi movie. But guess what? It's not just a fantasy anymore. IoT SSH from anywhere on Ubuntu has become a game-changer for tech enthusiasts, professionals, and hobbyists alike. Whether you're managing a home automation system or monitoring remote servers, this setup can save you time, effort, and a whole lot of headaches.
Now, before we get too deep into the nitty-gritty, let's break it down for you. IoT SSH from anywhere on Ubuntu is all about accessing your devices securely over the internet. No matter where you are, as long as you have an internet connection, you can manage your Ubuntu-powered gadgets like a pro. It’s like having a remote control for your digital life, but way cooler.
But here's the thing: setting it up the right way can be a bit tricky if you're new to this. That's why we're here. This guide will walk you through everything you need to know, step by step, so you can master IoT SSH on Ubuntu without breaking a sweat. So, grab your favorite drink, sit back, and let’s get started!
- Lia Thomas Wife The Story Behind The Spotlight
- Vega Thompson Onlyfans The Rising Star In The Digital Spotlight
Why IoT SSH on Ubuntu Matters
Let’s face it, the Internet of Things (IoT) is everywhere these days. From smart thermostats to self-driving cars, connected devices are becoming a part of our everyday lives. But what happens when you need to tweak or troubleshoot these devices remotely? That’s where IoT SSH comes in handy.
SSH, or Secure Shell, is like a secret tunnel that lets you connect to your devices securely over the internet. When you combine it with Ubuntu, you get a powerful and flexible platform that can handle pretty much anything you throw at it. Whether you're a developer, a network admin, or just someone who loves tinkering with gadgets, IoT SSH on Ubuntu gives you the freedom to manage your devices from anywhere in the world.
Here are a few reasons why IoT SSH on Ubuntu matters:
- Secure remote access to your devices
- Easy to set up with minimal hardware requirements
- Highly customizable and scalable
- Perfect for home automation, server management, and more
Understanding IoT SSH Basics
Before we jump into the setup process, it’s important to understand the basics of IoT SSH. Think of SSH as a secure communication channel between your computer and your IoT device. It uses encryption to protect your data and prevent unauthorized access.
Now, when you’re using Ubuntu as your operating system, you’re already halfway there. Ubuntu comes with built-in support for SSH, making it super easy to configure and use. Plus, it’s open-source, which means you can tweak it to fit your specific needs.
Here’s a quick rundown of the key components you’ll need to know:
- SSH Client: This is the software you’ll use to connect to your IoT device from your computer.
- SSH Server: This runs on your IoT device and listens for incoming connections.
- Keys: These are like digital passwords that authenticate your connection.
- Ports: By default, SSH uses port 22, but you can change it if you want to add an extra layer of security.
Setting Up SSH on Ubuntu
Alright, let’s talk about how to set up SSH on Ubuntu. Don’t worry, it’s not as complicated as it sounds. Follow these steps, and you’ll be up and running in no time.
First things first, make sure you have Ubuntu installed on your IoT device. If you’re using a Raspberry Pi or something similar, you can grab the Ubuntu Server image from the official website and flash it onto your SD card.
Once you’ve got Ubuntu up and running, open a terminal and type the following command to install the SSH server:
sudo apt update && sudo apt install openssh-server
After the installation is complete, you can check if the SSH server is running by typing:
sudo systemctl status ssh
If everything is set up correctly, you should see a message that says "active (running)." Congrats, you’ve just installed SSH on your Ubuntu device!
Connecting to Your IoT Device from Anywhere
Now that you’ve got SSH set up on your Ubuntu device, it’s time to connect to it from anywhere in the world. This is where things get really interesting. But first, let’s talk about a few important considerations.
One of the biggest challenges with remote SSH access is dealing with firewalls and network configurations. Most home networks use NAT (Network Address Translation), which means your IoT device has a private IP address that’s not directly accessible from the internet. To get around this, you’ll need to set up port forwarding on your router.
Here’s how you can do it:
- Log in to your router’s admin interface (usually by typing its IP address into your browser).
- Find the port forwarding settings and add a new rule.
- Set the external port to 22 (or whatever port you want to use for SSH).
- Set the internal IP address to the IP address of your Ubuntu device.
- Save the changes and restart your router if necessary.
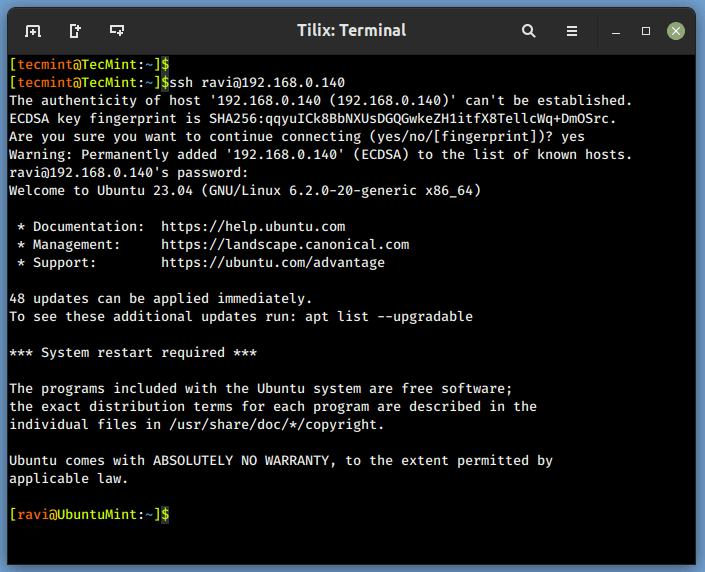
Once you’ve set up port forwarding, you can connect to your IoT device using its public IP address. You can find your public IP by visiting a site like whatismyip.com. Just open an SSH client on your computer (like PuTTY for Windows or the built-in terminal on macOS/Linux) and type:
ssh username@your-public-ip
Using Dynamic DNS for Easier Access
Here’s a pro tip: public IP addresses can change over time, especially if you’re using a home internet connection. To avoid having to update your SSH connection every time your IP changes, you can use a Dynamic DNS (DDNS) service.
A DDNS service assigns a domain name to your public IP address and updates it automatically whenever it changes. There are plenty of free and paid DDNS services out there, like No-IP and DuckDNS. Just sign up for one, configure it on your router, and you’ll always have a reliable way to access your IoT device.
Securing Your IoT SSH Connection
Security should always be a top priority when setting up IoT SSH. After all, you’re opening up your device to the internet, which means it’s potentially vulnerable to hackers and other bad actors. But don’t panic, there are plenty of ways to make your SSH connection more secure.
Here are a few tips to keep your IoT SSH setup safe:
- Change the default SSH port from 22 to something less obvious (like 2222).
- Use SSH keys instead of passwords for authentication.
- Enable two-factor authentication (2FA) for an extra layer of security.
- Limit access to specific IP addresses using firewall rules.
Let’s talk about SSH keys for a moment. SSH keys are like digital keys that let you log in to your device without entering a password. To set them up, follow these steps:
- Generate a key pair on your computer by typing: ssh-keygen
- Copy the public key to your Ubuntu device: ssh-copy-id username@your-public-ip
- Test the connection by typing: ssh username@your-public-ip
With SSH keys in place, you’ll never have to worry about forgetting your password again. Plus, it’s way more secure than using a regular password.
Monitoring and Logging SSH Connections
Another important aspect of securing your IoT SSH setup is monitoring and logging connections. This way, you can keep an eye on who’s accessing your device and when. Ubuntu makes it easy to log SSH activity by default, but you can also use tools like Fail2Ban to automatically block suspicious IP addresses.
Here’s how you can check your SSH logs:
sudo tail -f /var/log/auth.log
This command will show you the latest entries in your authentication log, including successful and failed login attempts. If you notice anything suspicious, you can investigate further and take appropriate action.
Advanced IoT SSH Techniques
Once you’ve got the basics down, you can start exploring some advanced IoT SSH techniques. These can help you streamline your workflow and make the most out of your Ubuntu-powered devices.
One cool trick is setting up SSH tunnels. An SSH tunnel lets you securely forward traffic from one machine to another, which is especially useful if you need to access services that aren’t directly exposed to the internet. For example, you could use an SSH tunnel to access a database or web server running on your IoT device.
Here’s how you can set up an SSH tunnel:
ssh -L local-port:destination-host:destination-port username@your-public-ip
Another advanced technique is using SSH config files. These let you define custom SSH settings for specific hosts, so you don’t have to type the same commands over and over again. Just create a file called ~/.ssh/config and add entries like this:
Host my-iot-device
HostName your-public-ip
Port 2222
User username
With this setup, you can simply type ssh my-iot-device to connect to your device without having to remember all the details.
Automating IoT SSH Tasks
If you find yourself performing the same SSH tasks repeatedly, why not automate them? You can use tools like Ansible or Fabric to automate SSH-based workflows, making your life much easier.
For example, you could write a script that automatically updates your IoT device, restarts services, or performs routine maintenance tasks. Just imagine how much time you could save by automating these repetitive tasks!
Troubleshooting Common IoT SSH Issues
Even with the best setup, things can go wrong sometimes. If you’re having trouble with your IoT SSH connection, here are a few common issues and how to fix them:
- Connection Refused: Make sure the SSH server is running and port forwarding is set up correctly.
- Permission Denied: Check your SSH keys and make sure the permissions on your ~/.ssh directory are correct.
- Timeout Errors: Verify your public IP address and ensure there are no firewall rules blocking your connection.
If none of these solutions work, don’t hesitate to check the logs for more detailed error messages. They can often point you in the right direction.
Conclusion
And there you have it, folks! You now know everything you need to set up and use IoT SSH from anywhere on Ubuntu. Whether you’re managing a fleet of IoT devices or just tinkering with a single Raspberry Pi, this setup can save you a ton of time and hassle.
So, what are you waiting for? Go ahead and try it out for yourself. And when you’re done, don’t forget to share your experience in the comments below. Who knows, you might just inspire someone else to dive into the world of IoT SSH on Ubuntu!
Table of Contents
- Why IoT SSH on Ubuntu Matters
- Understanding IoT SSH Basics
- Setting Up SSH on Ubuntu
- Connecting to Your IoT Device from Anywhere
- Using Dynamic DNS for Easier Access
- Securing Your IoT SSH Connection
- Monitoring and Logging SSH Connections
- Advanced IoT SSH Techniques
- Automating IoT SSH Tasks
- Troubleshooting Common IoT SSH Issues
- Talissa Smalley Nude The Truth Behind The Headlines
- Madelyn Cline Nude Separating Facts From Fiction And Understanding Privacy In The Spotlight

How to Remote Access Ubuntu SSH Server over the

Unlocking The Power Of Remote SSH IoT A Comprehensive Guide
The Ultimate Tutorial Enabling SSH on Ubuntu Made Easy
