How To Use Access Raspberry Pi VNC Over Internet Windows: The Ultimate Guide For Tech Enthusiasts
So, you wanna know how to use access Raspberry Pi VNC over internet Windows, huh? Well, my friend, you've come to the right place. In this digital age, being able to control your Raspberry Pi remotely is like having a superpower. Imagine sitting on your couch, sipping coffee, and accessing your Pi from your Windows PC as if it were right in front of you. Sounds cool, right? Let's dive in and make this happen.
Accessing Raspberry Pi VNC over the internet through Windows might sound intimidating at first, but trust me, it’s not rocket science. Once you get the hang of it, you’ll be doing it like a pro in no time. This guide will walk you step-by-step through the process, ensuring you don’t miss a single detail. Whether you’re a beginner or an advanced user, this article has got you covered.
Before we dive deeper, let’s quickly set the stage. Remote access to your Raspberry Pi using VNC viewer is super useful for managing projects, troubleshooting, or even just tinkering around. By the end of this guide, you’ll have the knowledge and skills to connect your Raspberry Pi securely from anywhere in the world using your Windows PC. Let’s get started!
- Zulma Aponte Shimkus A Rising Star In The Spotlight
- Jasmine Sherni Unveiling The Rising Stars Journey And Achievements
Why You Should Use Raspberry Pi VNC Over Internet
Alright, so why exactly should you bother with Raspberry Pi VNC over the internet? Well, let me break it down for ya. First off, it gives you flexibility. You don’t have to be physically near your Pi to manage it. Whether you’re at work, on vacation, or just chilling at home, you can access your Pi whenever you want. Plus, it’s super secure when done correctly, which we’ll cover later in this article.
Another cool thing is that VNC is user-friendly. It’s not one of those complicated tools that requires a PhD in computer science to figure out. Even if you’re new to the world of Raspberry Pi, you can easily set it up and start using it. And let’s not forget the cost savings. Instead of buying expensive hardware, you can use your existing Windows PC to access your Pi remotely. It’s like getting two devices for the price of one!
Benefits of Using VNC Viewer for Raspberry Pi
- Remote control from anywhere in the world
- Secure connection with encryption
- Easy setup process
- Minimal hardware requirements
- Compatibility with various operating systems
So, as you can see, there are plenty of reasons to use VNC for your Raspberry Pi. Now, let’s move on to the nitty-gritty details of how to actually set it up.
- Lia Thomas Wife The Story Behind The Spotlight
- Best Remoteiot Vpc Ssh Raspberry Pi Free Your Ultimate Guide
What You Need to Get Started
Before we jump into the setup process, let’s make sure you’ve got everything you need. Here’s a quick checklist:
- A Raspberry Pi with Raspbian OS installed
- An active internet connection on both your Pi and Windows PC
- A VNC Viewer app installed on your Windows PC
- A static IP address or dynamic DNS service for your Pi
- Basic knowledge of networking and Linux commands
Don’t worry if you’re not familiar with some of these terms. We’ll explain them as we go along. The main thing is to have your Raspberry Pi up and running and connected to the internet. Once you’ve got that sorted, we can move on to the next step.
Setting Up VNC Server on Raspberry Pi
Alright, now it’s time to set up the VNC server on your Raspberry Pi. This is the first step in accessing your Pi remotely. Follow these steps carefully:
First things first, boot up your Raspberry Pi and open the terminal. Type in the following command to enable VNC server:
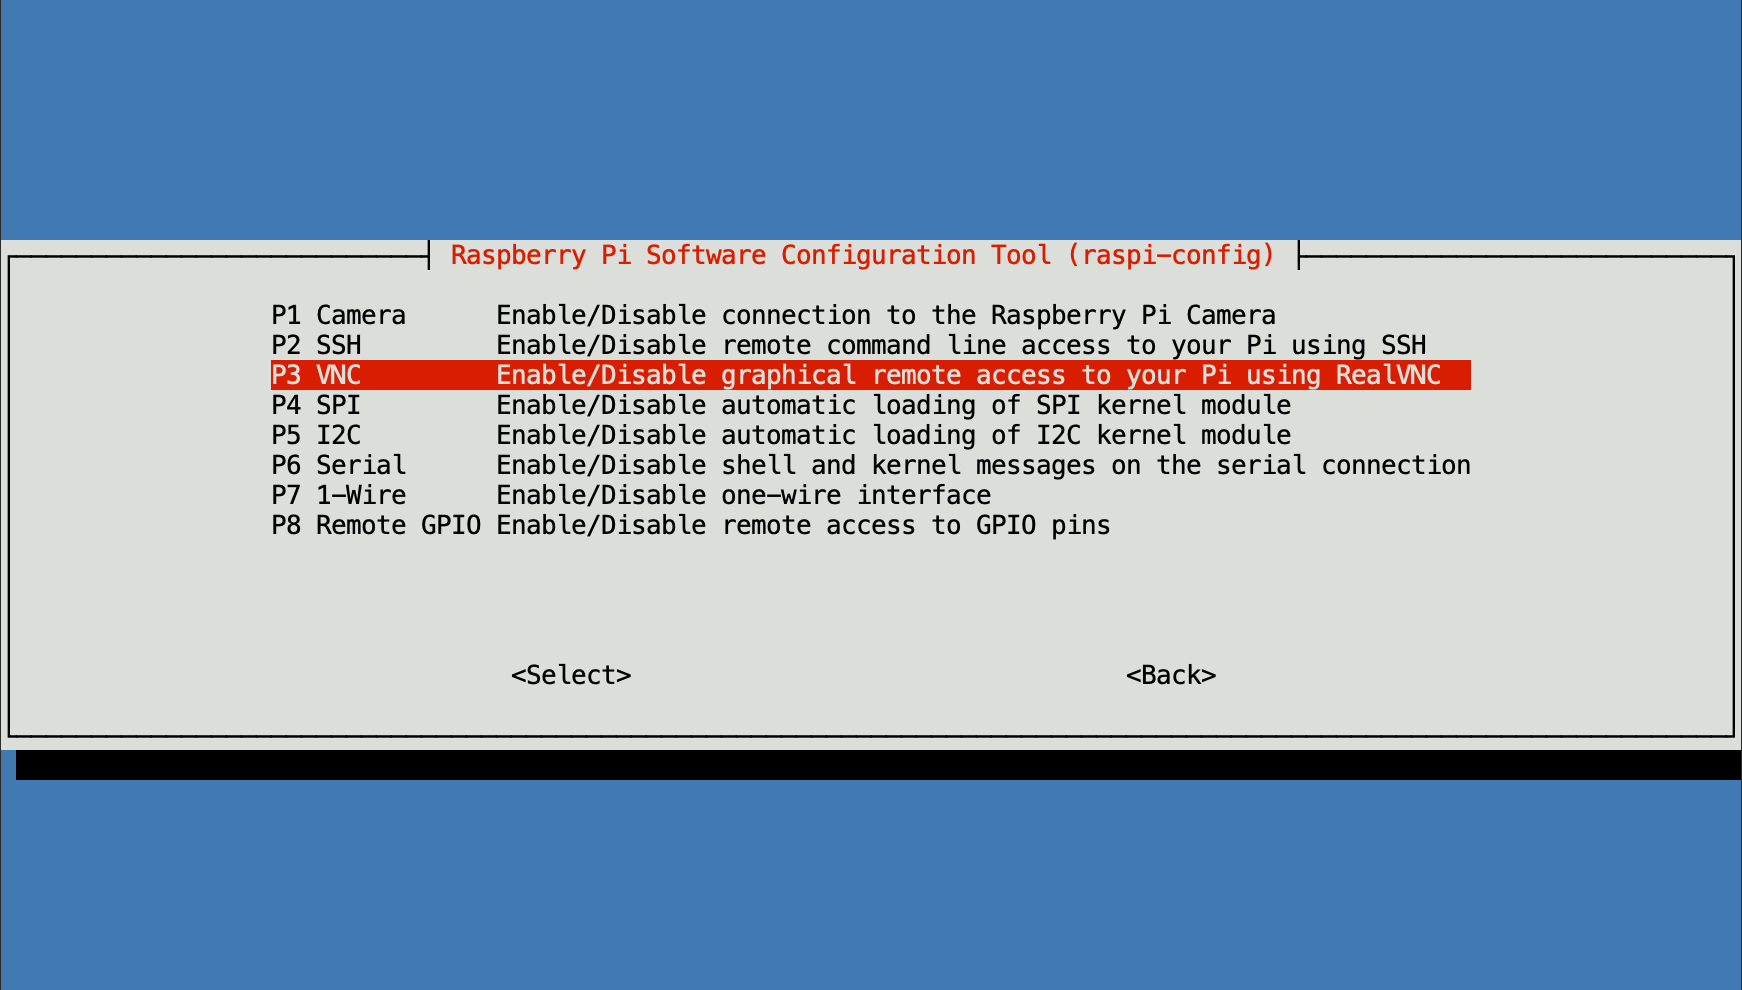
sudo raspi-config
This will open the Raspberry Pi configuration menu. Navigate to Interfacing Options and select VNC. Hit Enter and choose Yes to enable the VNC server. Once it’s enabled, go back to the main menu and select Finish. That’s it! Your VNC server is now up and running.
But wait, there’s more. To make sure everything is working smoothly, reboot your Pi using the following command:
sudo reboot
After the reboot, you can test the VNC server by connecting to it locally from your Windows PC. We’ll cover that in the next section.
Connecting Locally with VNC Viewer
Now that your VNC server is up and running, it’s time to connect to it using VNC Viewer on your Windows PC. This is a good way to test the setup before moving on to remote access over the internet.
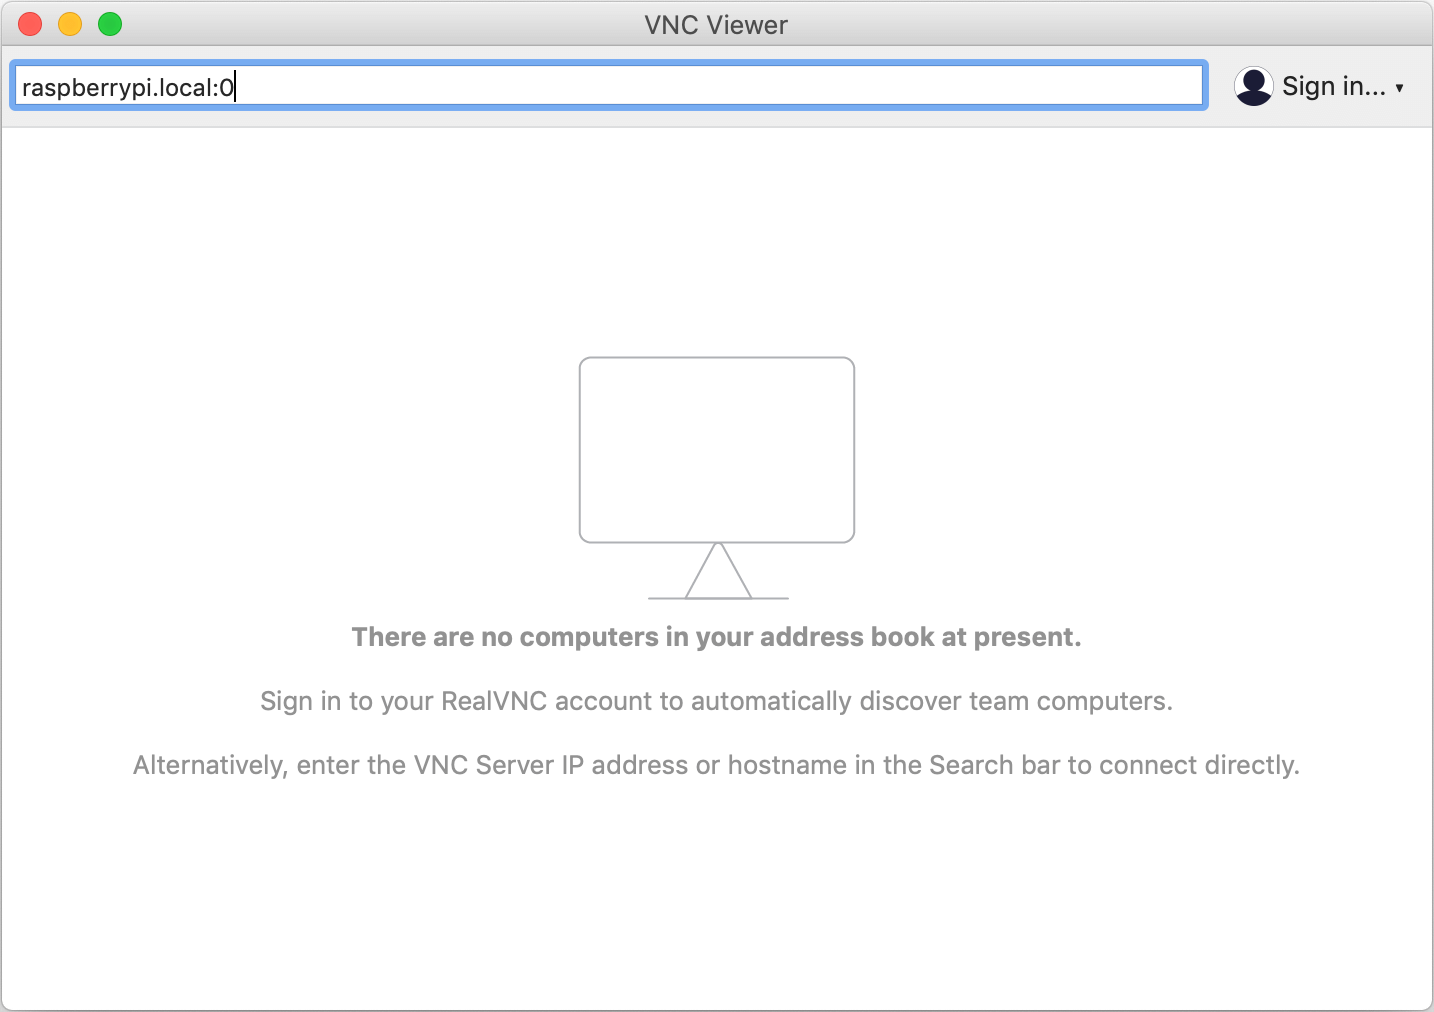
Download and install the VNC Viewer app from the official website. Once installed, open the app and enter the IP address of your Raspberry Pi. Not sure how to find the IP address? No worries, just type the following command in the terminal on your Pi:
hostname -I
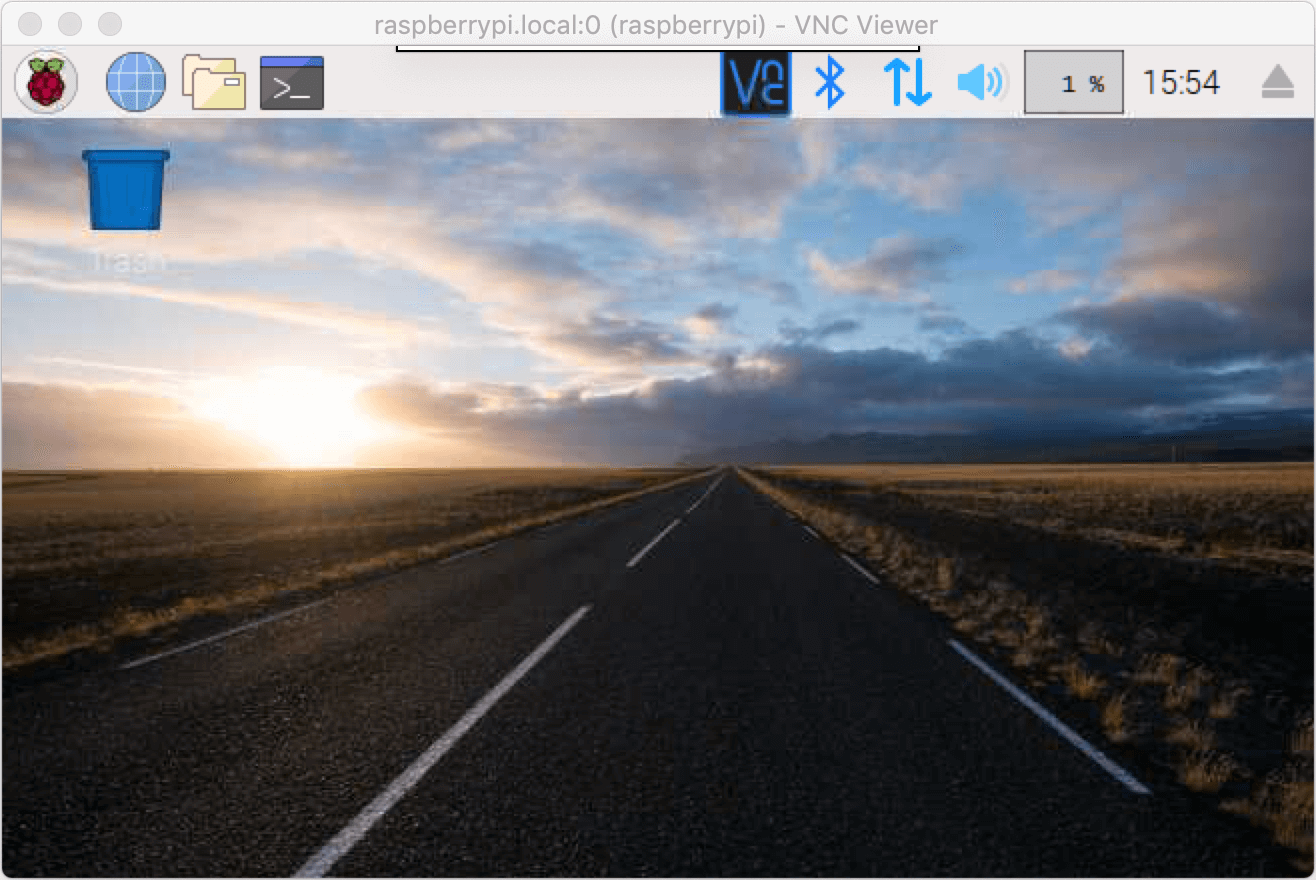
This will display the IP address of your Pi. Enter this address in the VNC Viewer app and hit Connect. If everything is set up correctly, you should now see your Raspberry Pi’s desktop on your Windows PC. Cool, right?
Troubleshooting Local VNC Connection
If you’re having trouble connecting locally, here are a few things to check:
- Make sure both your Pi and Windows PC are connected to the same network
- Verify that the VNC server is enabled on your Pi
- Check the IP address you entered in the VNC Viewer app
- Ensure there are no firewalls blocking the connection
If you’ve checked all these and still can’t connect, don’t panic. There are plenty of online resources and forums where you can get help. Just remember to stay calm and methodical in your troubleshooting.
Setting Up Remote Access Over the Internet
Alright, now that you’ve successfully connected locally, it’s time to take it to the next level – remote access over the internet. This is where things get a little more interesting.
The first step is to set up a static IP address for your Raspberry Pi. This ensures that your Pi always has the same IP address, making it easier to connect to from anywhere in the world. To do this, open the terminal on your Pi and type:
sudo nano /etc/dhcpcd.conf
Scroll down to the bottom of the file and add the following lines:
interface eth0
static ip_address=192.168.1.100/24
static routers=192.168.1.1
static domain_name_servers=192.168.1.1
Replace the IP address with the one you want to use. Save the file and exit by pressing Ctrl+X, then Y, and Enter. Reboot your Pi to apply the changes.
Using Dynamic DNS for Remote Access
Another option is to use a dynamic DNS service. This is especially useful if your internet provider assigns a dynamic IP address to your network. Services like No-IP or DuckDNS allow you to assign a domain name to your Pi’s IP address, making it easier to connect remotely.
To set this up, sign up for a dynamic DNS service and follow their instructions to configure your router. Once that’s done, you can use the assigned domain name to connect to your Pi from anywhere in the world.
Securing Your Remote Connection
Security is super important when accessing your Raspberry Pi over the internet. You don’t want some random hacker gaining access to your Pi and causing chaos. Here are a few tips to keep your remote connection secure:
- Use strong passwords for both your Pi and VNC server
- Enable encryption in the VNC settings
- Set up a firewall to block unauthorized access
- Regularly update your Pi’s software and firmware
By following these tips, you can rest assured that your Raspberry Pi is as secure as possible. Remember, security is an ongoing process, so keep an eye on any new vulnerabilities and patch them promptly.
Advanced Security Measures
If you want to take security to the next level, consider setting up a Virtual Private Network (VPN) for your Pi. This creates an encrypted tunnel between your Windows PC and your Pi, making it virtually impossible for hackers to intercept your data. There are plenty of VPN services available, both free and paid, so do some research and choose one that suits your needs.
Tips and Tricks for Efficient Remote Access
Now that you’ve got everything set up, here are a few tips and tricks to make your remote access experience even better:
- Use keyboard shortcuts to speed up your workflow
- Organize your desktop to make navigation easier
- Save frequently used commands as scripts
- Use the clipboard to copy and paste between your Pi and Windows PC
These little tricks can save you a ton of time and make your life much easier. Plus, they make you look like a total tech wizard to your friends and family. Who doesn’t want that?
Common Mistakes to Avoid
Finally, let’s talk about some common mistakes people make when setting up remote access for their Raspberry Pi. Here are a few to watch out for:
- Forgetting to enable the VNC server
- Not setting up a static IP address or dynamic DNS
- Using weak passwords
- Ignoring security updates
Avoid these mistakes and you’ll be well on your way to becoming a Raspberry Pi remote access expert.
Conclusion
And there you have it, folks. You now know how to use access Raspberry Pi VNC over internet Windows like a pro. By following the steps in this guide, you can enjoy the flexibility and convenience of remote access while keeping your Pi secure. Remember, practice makes perfect, so don’t be afraid to experiment and try new things.
Before I go, let me leave you with a little call to action. If you found this guide helpful, drop a comment below and let me know. Also, feel free to share it with your friends and fellow tech enthusiasts. And hey, if you’ve got any questions or need further clarification, don’t hesitate to ask. I’m here to help!
Table of Contents
- Why You Should Use Raspberry Pi VNC Over Internet
- What You Need to Get Started
- Connecting Locally with VNC Viewer
- Setting Up Remote Access Over the Internet
- Securing Your Remote Connection
- Tips and Tricks for Efficient Remote Access
- Conclusion
- Jameliz Smith The Rising Star In The Adult Entertainment Industry
- Penelope Menchaca Onlyfans The Rise Of A Digital Sensation
How to remotely access the Desktop of your Raspberry Pi over the
How to remotely access the Desktop of your Raspberry Pi over the
How to remotely access the Desktop of your Raspberry Pi over the
